Premises
Premises are virtual building blocks of your customer system. In practice, premises represent different areas that can be secured with locks, such as buildings, corridors, staircases, garages, and apartments
The primary advantage of the premises concept is that it segments the customer system into manageable entities such as buildings or sites, simplifying both management and maintenance.
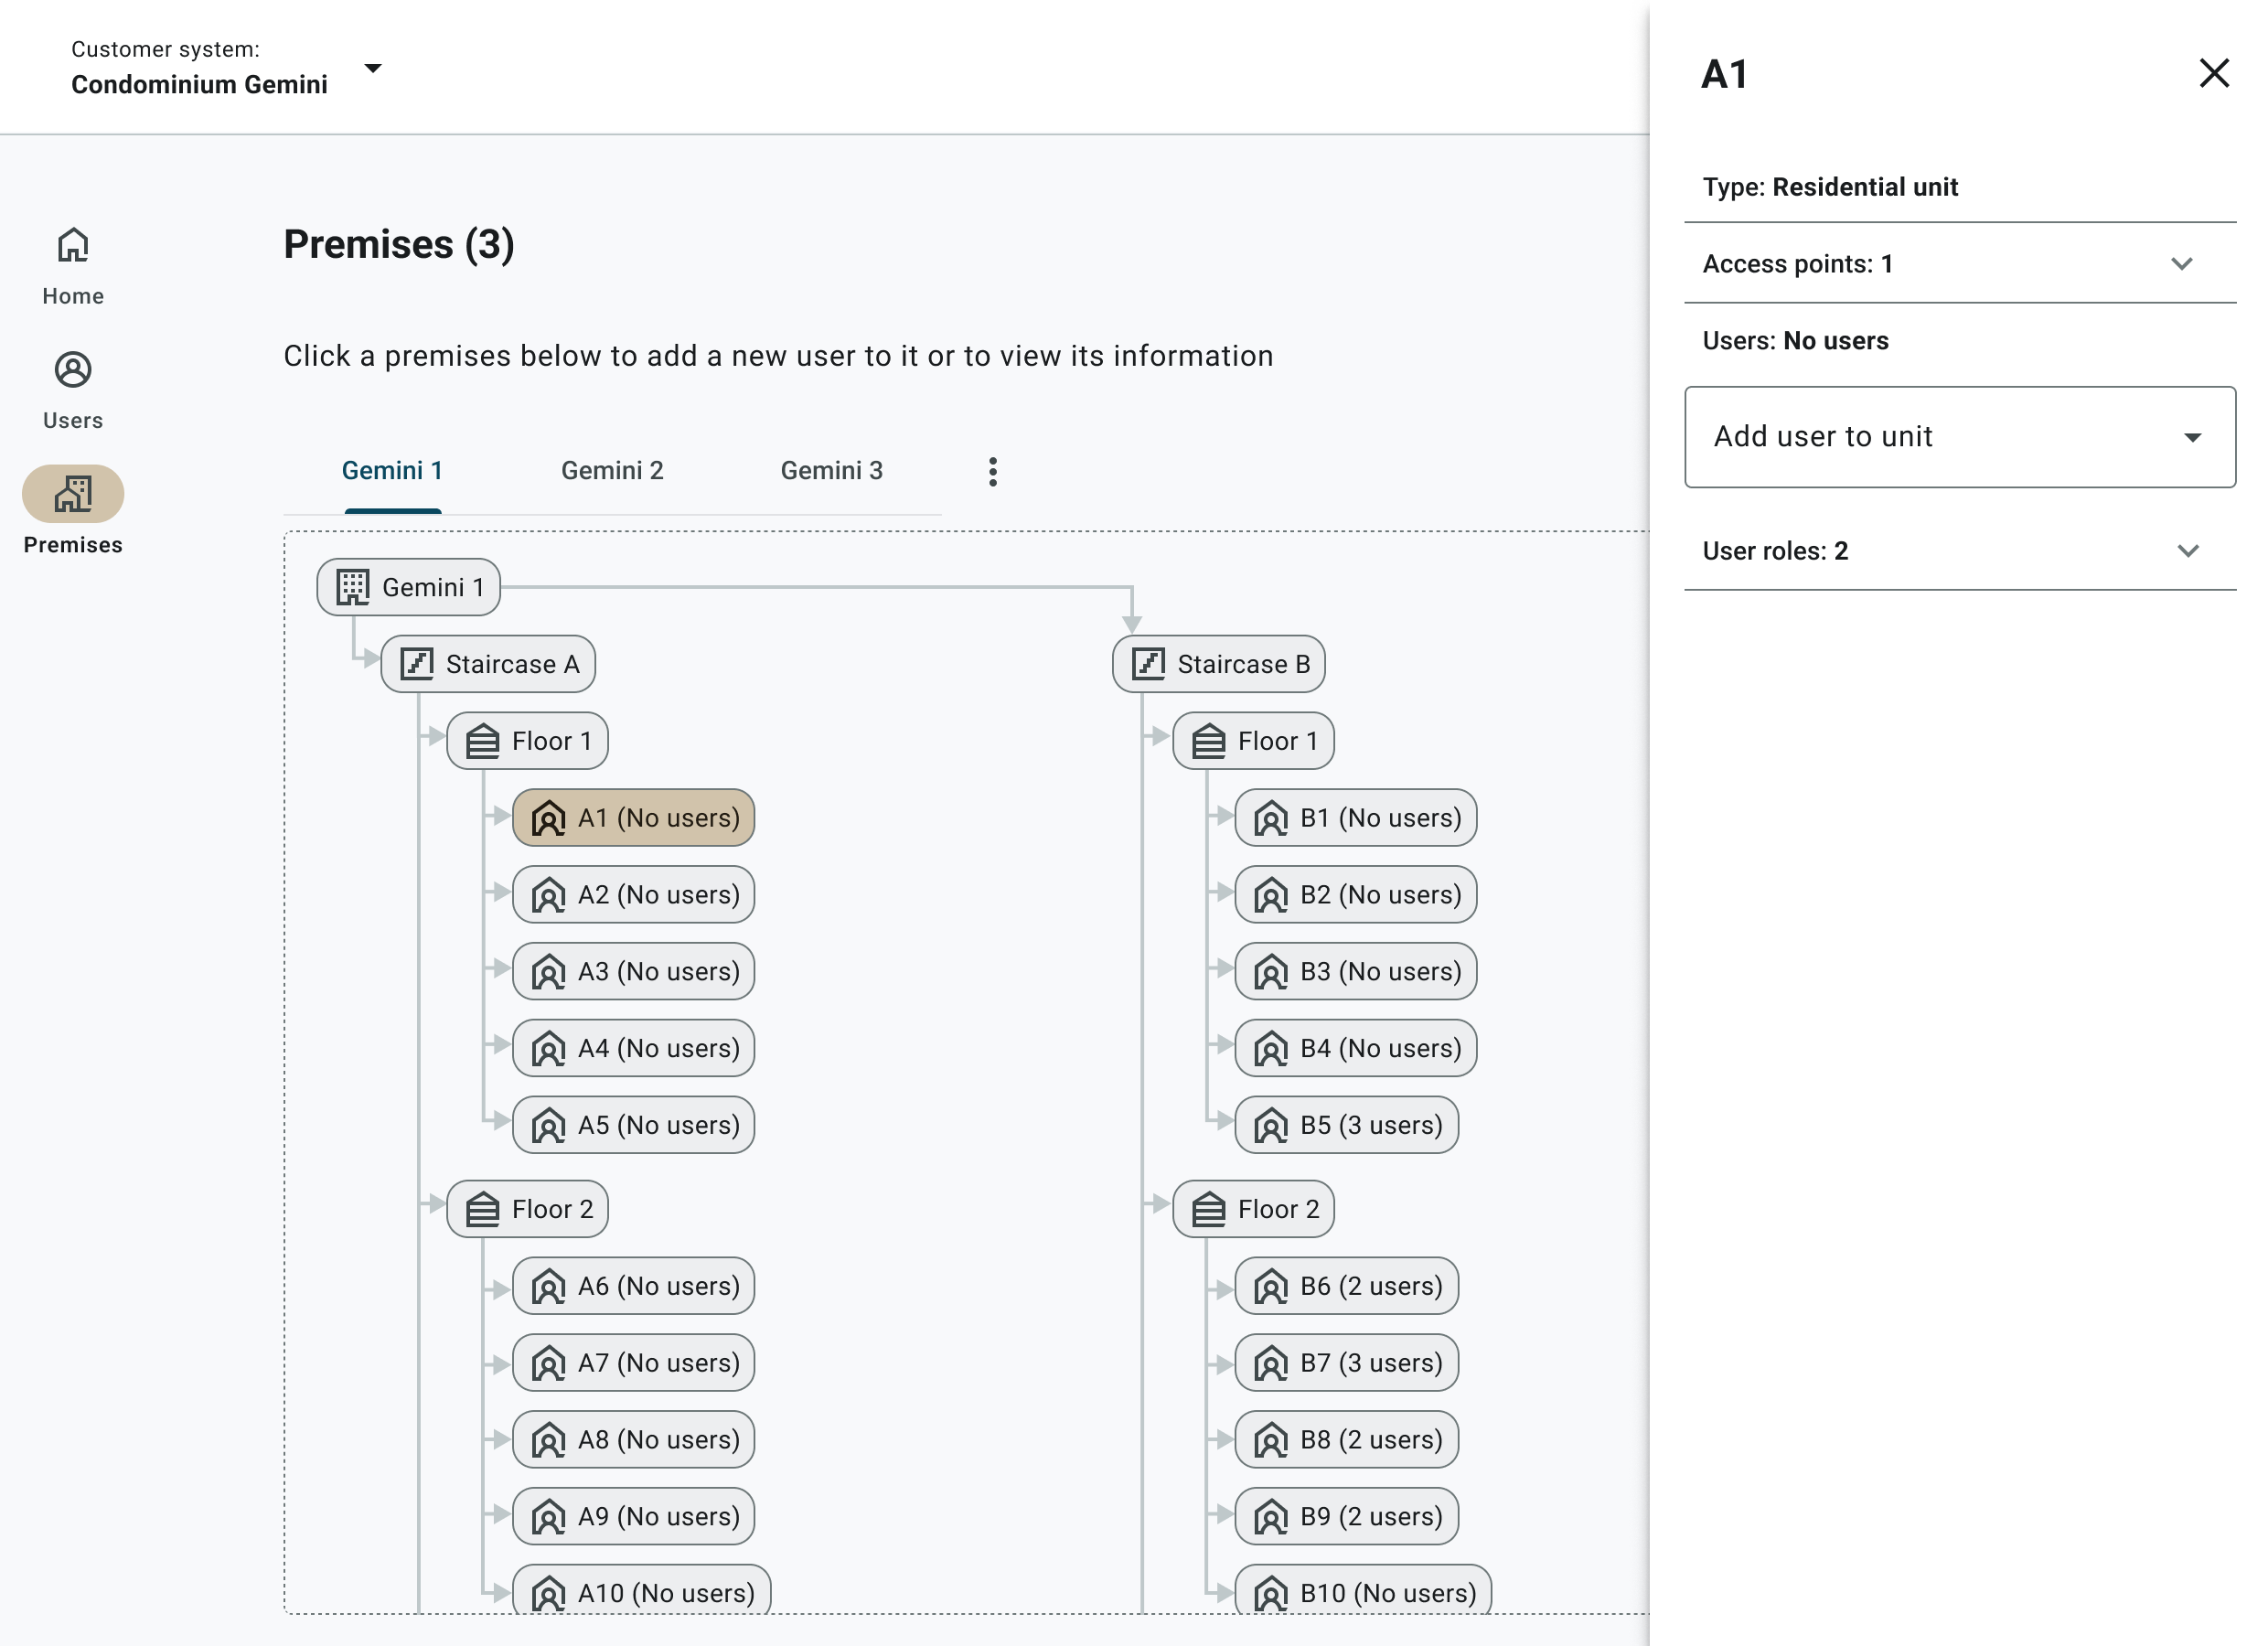
The premises structure is created using a canvas, and it is a visual representation of your customer system, showing the relationships between different premises.
In iLOQ Web you can manage the premises within the premises structure. The editing options include adding, editing, deleting, moving premises, and creating sub-premises.
See the image below for an example of a simple premises structure.
Private premises
Private premises are premises that have been marked as private. Users assigned to private premises are granted access to the premises’ locks. They can also share keys with others and define the locks they can access with the shared keys. Additionally, private premises may include linked user roles, granting users access to the roles’ locks.
Add premises
Add new premises to your customer system.
- Select Premises from the main menu.
- Select Add premises.
- Select the Premises type from the drop-down menu.
- Give the premises a Name.
- Select Add.
Add sub-premises
Add sub-premises to existing premises. You can add a single sub-premises or create multiple sub-premises at once. When adding multiple sub-premises you can add a prefix and a starting number or letter to the sequence.
- Select Premises from the main menu.
- Select
 on the premises you want to add sub-premises to.
 - Select Add sub-premises.
- Select the Premises type from the drop-down menu.
- Select the Amount of the premises.
- If you select 1 premises: give it a name and select Add.
- If you select 2 or more premises: you can set a Prefix (optional) that will be used as the beginning of each premises name, and in Start from you can enter the starting number or letter for the premises sequence. When you’re done, select Add.
Sub-premises example
If you enter:
- Prefix: A
- Amount: 3
- Start from: 1
The following premises are created:
- A1
- A2
- A3
Edit premises
Edit the Premises type or Name of existing premises.
- Select Premises from the main menu.
- Select on the premises you want to edit.
- Edit the Premises type, Name or both.
- Select Save changes.
Delete premises
Delete existing premises. Note that you must delete all sub-premises before you can delete the parent premises.
- Select Premises from the main menu.
- Select on the premises you want to delete.
- Select Delete.
- Select OK to confirm.
Move premises
Move premises to another location in the premises structure. Existing settings and information are retained when the premises are moved.
- Select Premises from the main menu.
- Select on the premises you want to move.
- Select Move to.
- Select the parent premises under which you want to move the premises.
Premises view actions
In the Premises view, you do the following:
- View more details by clicking a cell in the structure.
- View users who have access to the premises.
- View roles that are linked to the premises.
- View which locks are linked to the premises.
- Add a new user to private premises: You can do this by selecting a suitable private premises and selecting add new user on the right-side panel. This is a quick and easy way to add a new user to private premises. If you need to adjust the user’s details, you can do that by editing the user.
- Remove a user from private premises: Select a private premises and click the remove icon in the right-side panel.
- PreviousRoles
- NextRemote unlocking